was successfully added to your cart.

Cart

Tag

barre modifications Archives - The Barre Blog

Michelle DuVall demonstrates 3 self-adjustments you can do at home or in class for barre workouts.

3 Self-Adjustments You Can Do to Make Your Barre Workout More Effective

By Exercises No Comments

We can make barre classes more effective by giving ourselves the power to improve our barre classes through our own intuition and efforts. I would also argue getting more out of class makes it more fun! Knowing that you’re feeling it in the “right” places as well as feeling more muscle engagement is self-empowering.

Now that we are taking more online, or socially distanced classes we may be missing out on the benefits of hands-on adjustments. We no longer have the chance (at least for now) for our instructors to use their hands-on guidance to improve our workout.

But I believe we can take things into our own hands! Try these 3 self-adjustments in class or at home:

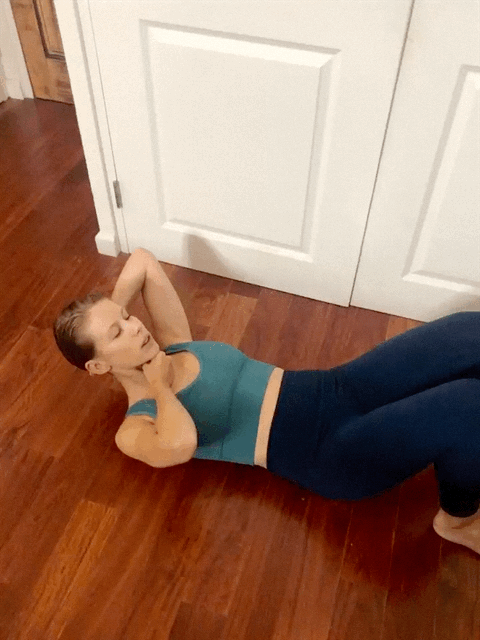
1. Fist under the chin

Neck placement is important to ensure that the upper body is in proper alignment to avoid any strain or pain, especially during abdominal exercises like crunches. It is also a hard placement to feel or see in one’s own body.

How to: Make a fist with one hand and place it under the chin. Create space and elongate the neck by resting the fist under the chin and on the clavicle.

Why: To create and honor the natural spinal curves in the front and back of the neck (cervical spine). This helps avoid compression in the vertebrae and/or craning the neck.

When to apply: This self-adjustment can be used during all abdominal exercises lying supine on the mat, which will help prevent the neck from dropping too much towards the chest and compressing the spine.
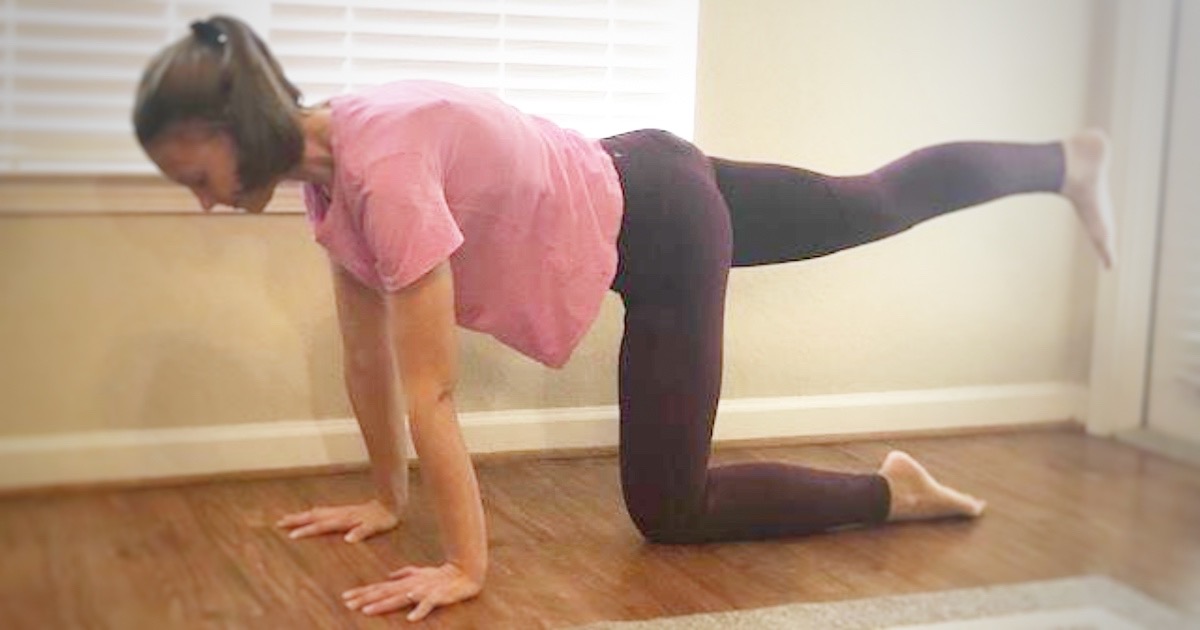
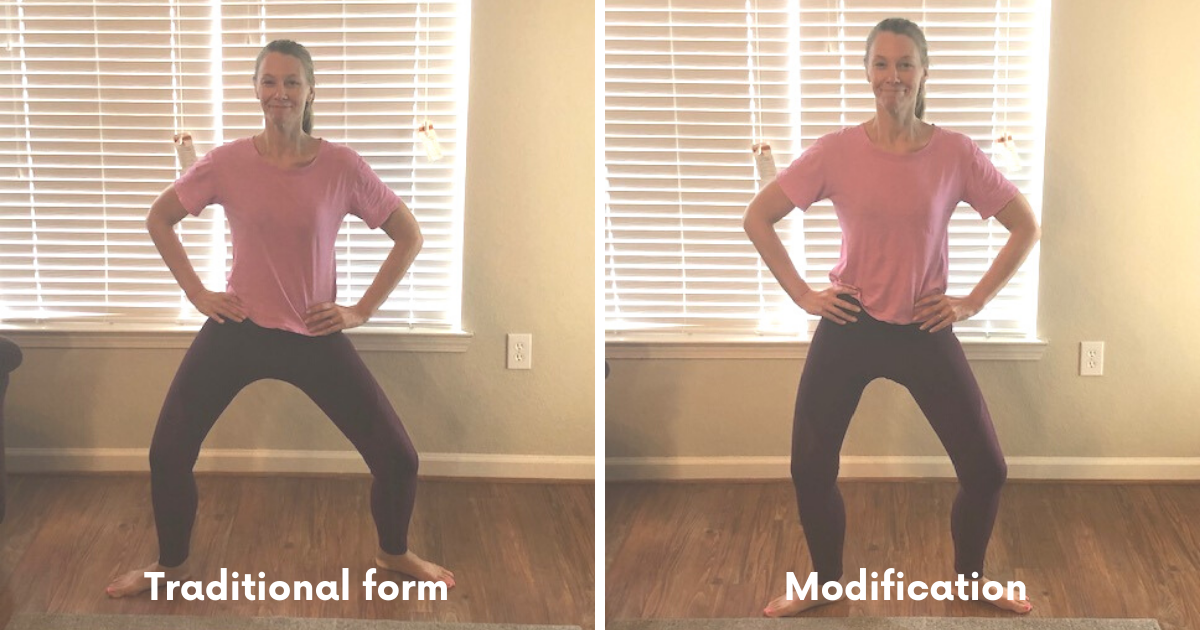
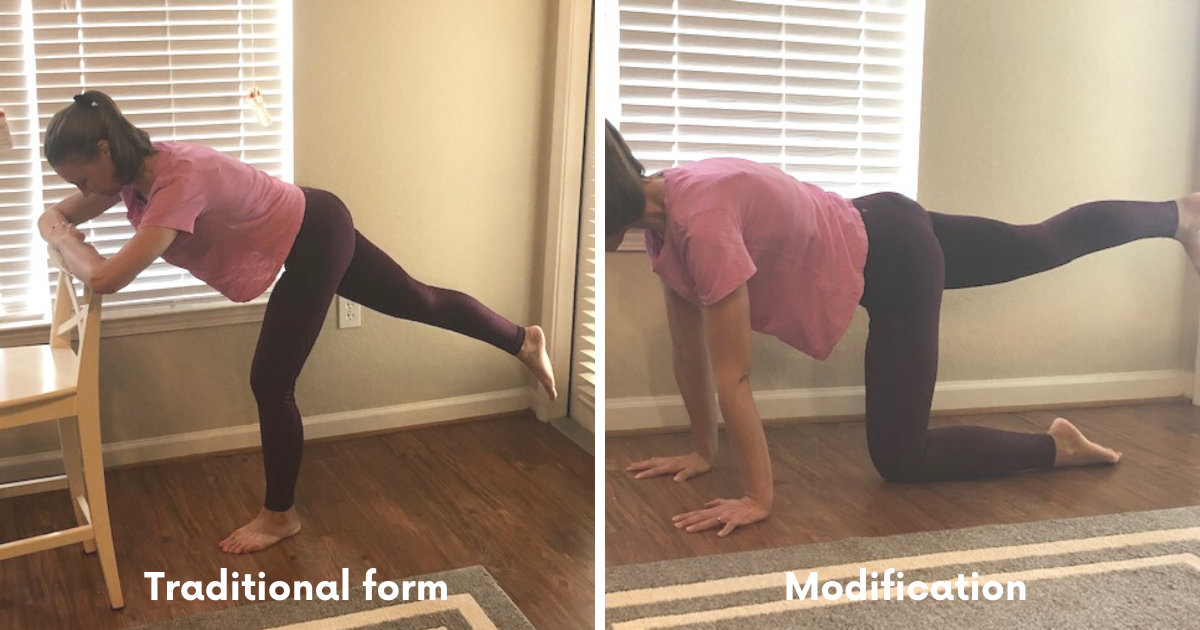
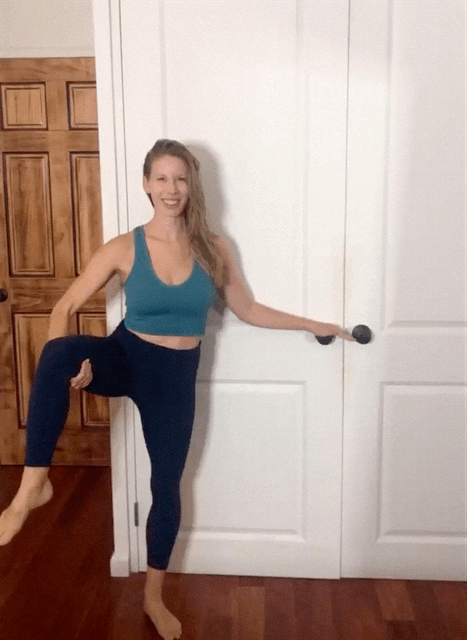
 

2. Hip re-placement

When the leg is being lifted off the floor in standing barre exercises, the hip often hikes up. This causes certain muscles to overwork and the body to be misaligned. Without a spot from a teacher, it can be a difficult position to master. Try this self-adjustment to put the hip back in its proper placement.

How to: Hold on to a barre or a chair with one hand with the feet in the first position. Lift one knee up and grab the back of the leg with the freehand. Hold the leg and allow the arm to take its weight. With the knee bent, try and level out the hips from right to left so they create a straight line from both sides.

Why: To find a more neutral pelvic position when doing leg lifts. This will keep the work from gripping the hip flexors and overworking the quads.

When to apply: Try doing this for any exercise that has the leg being lifted up off the floor while standing. If you feel the hip hiking up, do this self-correction to make any adjustments in alignment.
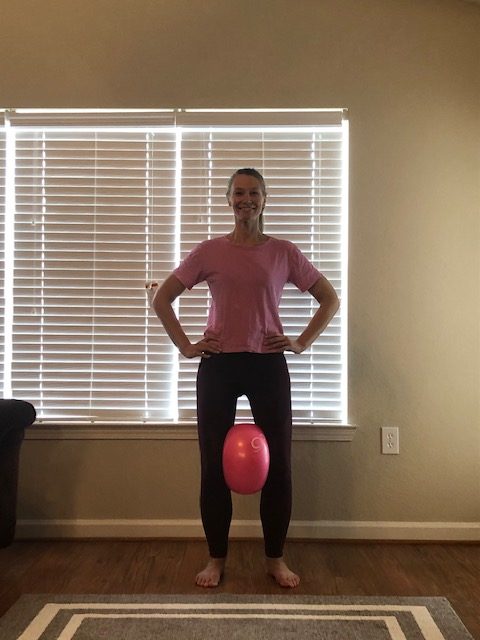
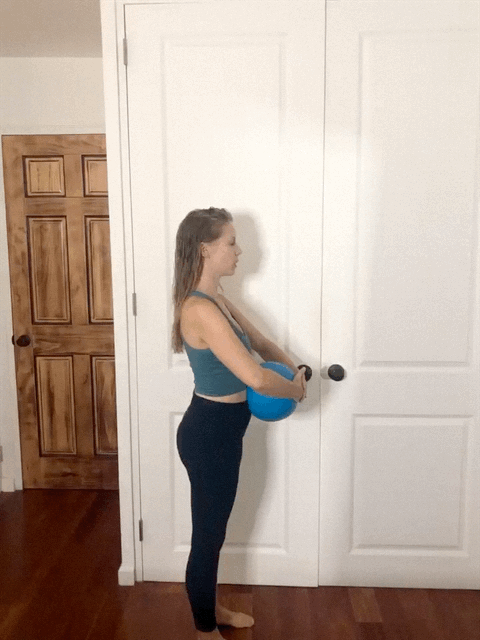


3. Ball bracing

We hear the words “engage your abs,” all the time in barre classes. Actually achieving it and really feeling it can feel very elusive. But using the ball as a tool is a great way to become more engaged.

How to: Place an inflatable ball on the abdominals with both hands places on the ball slightly pressing inward. As you inhale, push the ball into the hands. When you exhale, think of pulling the abdominals away from the ball as if you could hallow out the stomach and make room for the ball to fit in the abdominal cavity. Once the abdominals are scooped in try to at the same time create as much length in the lower spine as possible.

Why: Engaging and bracing the abdominals create support for the lower spine. Using a prop allows for a tactile experience to find a better abdominal connection.

When to apply: You can do this while standing, kneeling, lying supine and prone (using the floor instead of hands).


The ability to literally give yourself support so you can take more ownership out of your barre classes is an exciting achievement to obtain. Class begins to feel like follow the leader and more empowering with tools like these self-adjustments in your pocket. Now, get out there and take things into your own hands!


About the Author

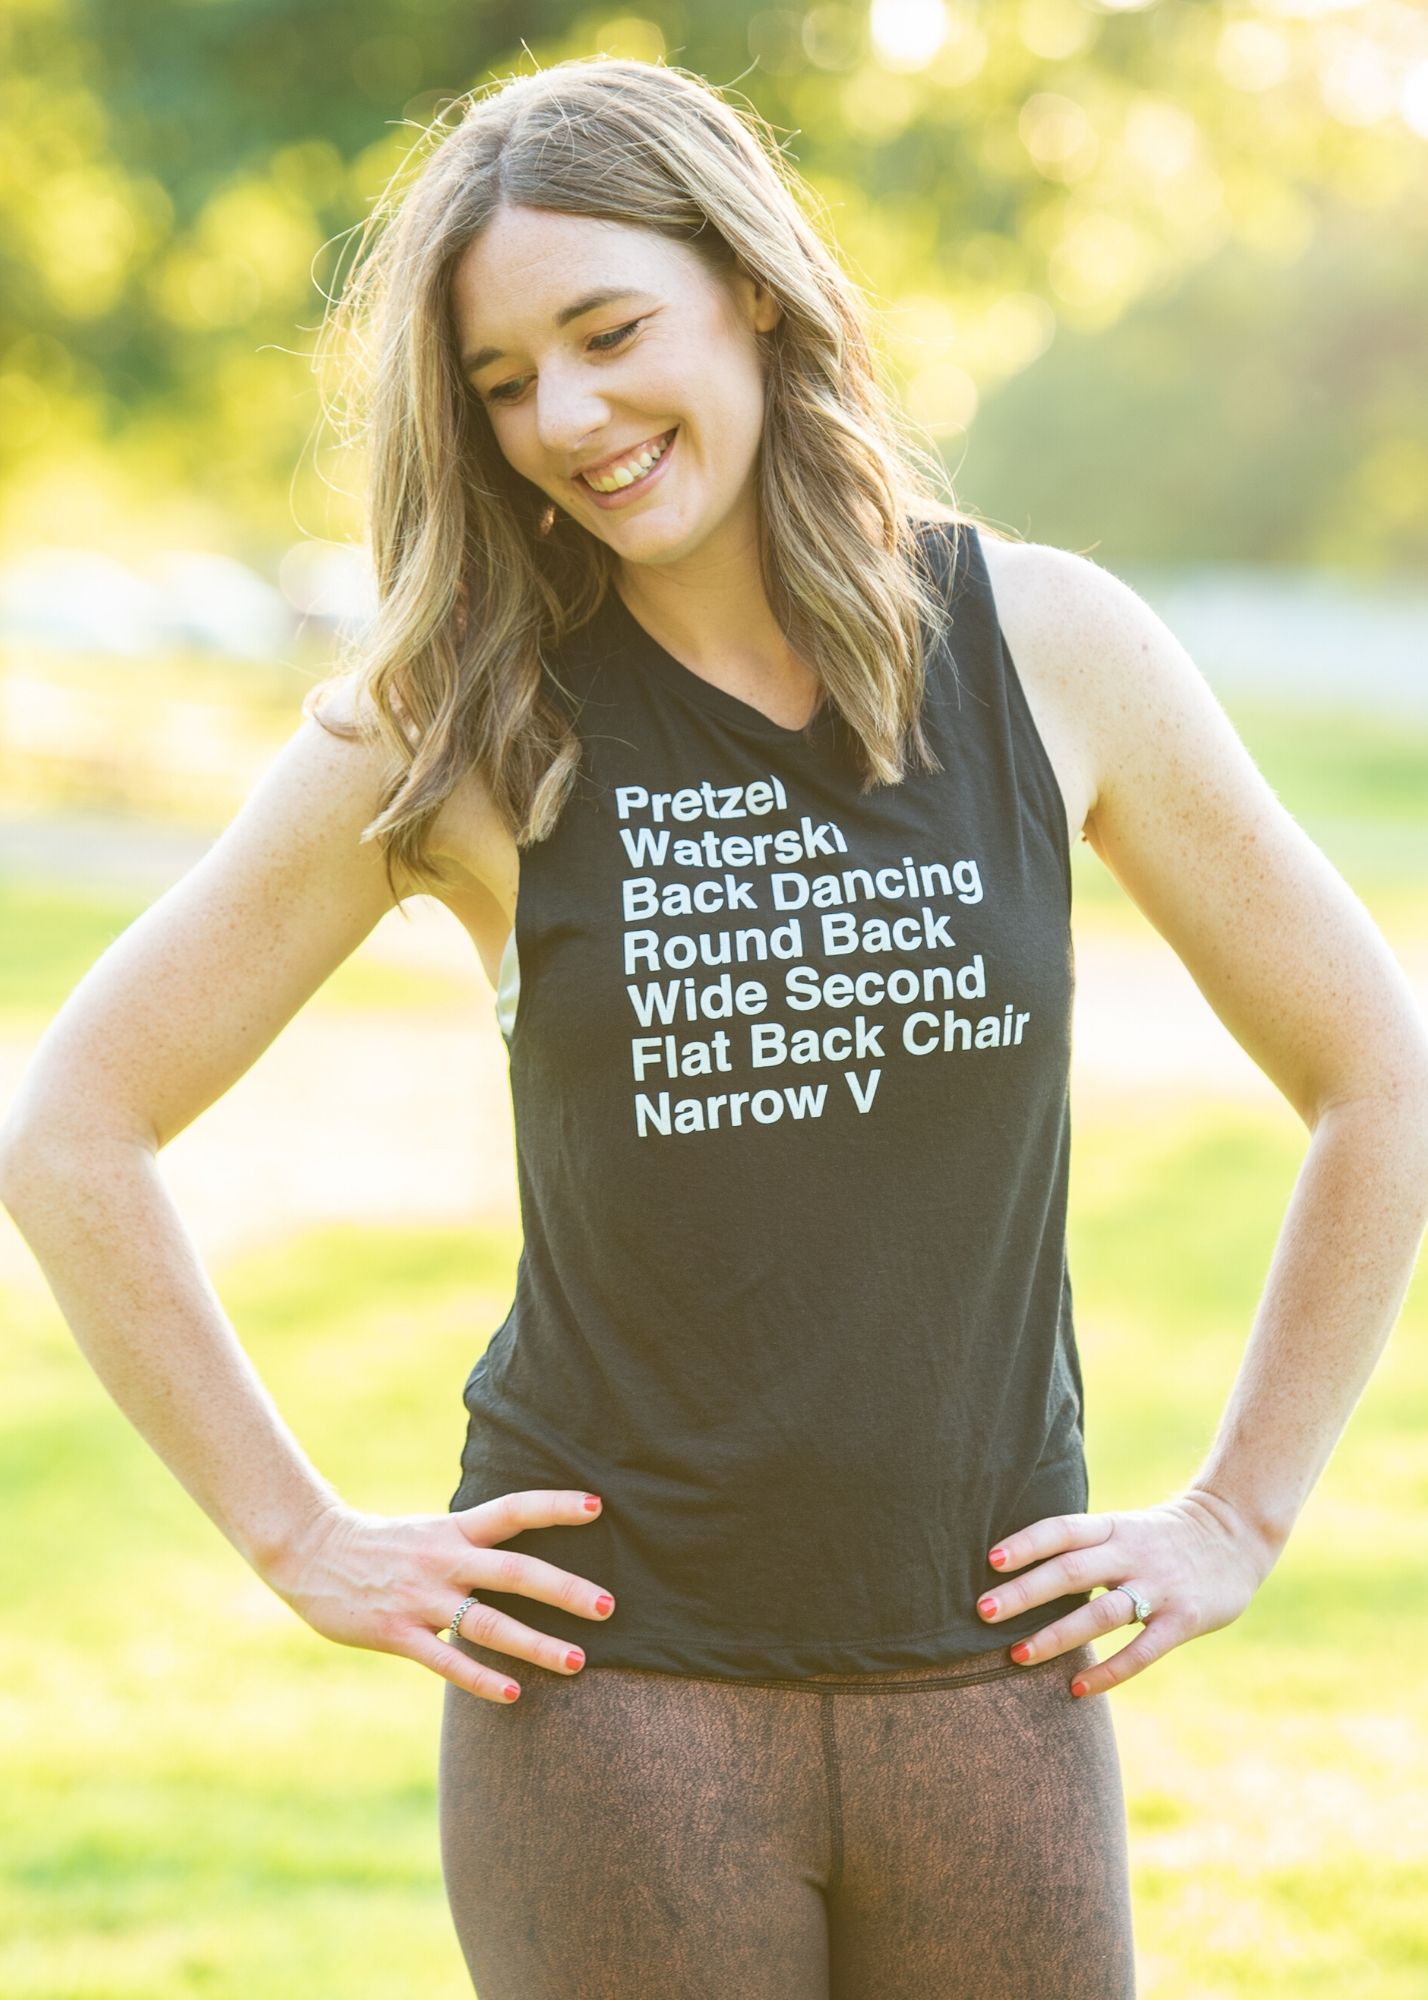
Michelle DuVall is the creator of Barre Variations, a compressive method and manual with an expanded syllabus of choreography and technique. She is also a passionate motivator who creates inclusive experiences for her community through movement sessions, wellness events and retreats.

How People With Joint Replacements Can Get the Most Out of a Barre Class

By Exercises One Comment

Barre promotes better posture and delivers on its promise to strengthen and tone, but the emphasis on proper form, holding poses for what can often feel like an excruciatingly long period of time, and building muscle fatigue can make getting the most out of a class difficult for people with joint replacements. Looking in the mirror and seeing that your form is just not quite right can also be a turn-off for individuals with joint restrictions.

Instructors promote barre as a low-impact alternative to more cardio-heavy fitness classes, making the tucking and signature shaking during extended holds ideal for joints that can’t handle traditional high-impact programs like HIIT. Correct as these claims are, introducing modifications for those with joint replacements (or really any structural limits on motion and flexibility) makes for a better experience.

And I should know. In 2015, I had a total right hip replacement which left me with a limited range of motion. As so often happens with these surgeries, my right leg is also about half an inch shorter than my left, adding some additional challenges to any physical activity. I started attending barre classes in Cleveland in 2017 while following my physician’s advice to seek out low-impact workouts that would put less stress on my joints.

During my first sessions, however, I was discouraged by my wacky form and off-balance attempts to get into signature positions. I nearly threw in the towel and decided that barre just wouldn’t work for me. Fortunately, with the help of some instructors, I learned modifications that allowed me to get the most out of my workouts while also protecting my joints. I recently completed my barre instructor training and prioritize making barre accessible for everyone, including people like me!

Below are some examples of modifications for taking barre with joint replacements or restrictions:


1) Wide Second position

Let’s face it: My wide second position is not very wide. As you can see in the picture below, my right knee cannot rotate back because of my replacement and limited range of motion. This prevents me from a) getting low in wide second and b) achieving the correct form where my right knee moves over my second toe. People with knee replacements might also have this problem.


Wide second modification for someone with a hip replacement


A modification is simply to not get so deep into the position. I learned that I have to go about 70% of the way down and to shorten my stance a bit. This allows me to get some of that outward rotation with my right hip without forcing the position. My form is not perfect, but what matters in this position (and any others in barre) is that you are still working the targeted muscles, in this case, the inner thighs and glutes for plies. Even though I am not as wide or low, I can still feel the stretch and lengthening in my thighs, letting me know that the pose is working.

For those with knee replacements, modifications are similar for many poses like wide second. Practice focusing on the moves without going as deep. You can still get the same effect by doing shallow plies or pulses.


2)  Parallel and First Positions

I don’t have as many issues with parallel and first positions with a hip replacement, but these can be especially challenging if you have a knee replacement. Apart from accepting that you won’t be able to go as low as others in the class, placing a ball between your knees will help to stabilize your joints. You’ll also be getting an extra boost in this position because you will be using your inner thighs to hold onto the ball while getting the quad work with smaller plies, pulses, and holds. With a joint replacement or knee issues, you get a double-duty workout!


Parallel position with ball


3) Standing Barre Moves and Mat Work

Here’s a good modification to have in your back pocket if you have a replacement or joint restriction yourself or if you’re an instructor: 95% of positions that can be done at the barre can also be done on the mat and vice versa. I often find it challenging to do standing poses at the barre like the standard leg lift below.

For many people who have joint replacements (even with extended physical therapy), overcompensating with the non-replacement joint means that side tends to get fatigued earlier than the other. This translates into me not being able to hold proper form, leading to lower back pain (always something to avoid no matter what pose) and the feeling that I’m not getting my working leg high enough for a solid workout.


Barre seat exercise modification option for someone with a hip replacement


An easy modification is to simply move to the mat and perform the same movement on all fours. You’ll be working the targeted muscle group but will be able to focus more on feeling the micro-movements in the glutes or thighs rather than focusing on how high you can get your leg. You can further modify by moving to your forearms.

This modification in many ways is a mental change in your approach to barre. You have to convince yourself that it’s okay to move down to the ground and look different from everyone else and that you are getting the same benefits from the poses.

The same goes for people with knee replacements. Doing mat work while kneeling can be torture. If that is the case, you can move up to the barre and maybe add a slight bend in the non-working leg.

There are many modifications that you can do to ensure that you or your clients have a good experience in class or at home. And if you have a joint replacement, you have an extra advantage in that focusing on the muscles and movements no matter how low or wide you can get helps to build a mental connection that leads to a more effective workout!

No matter what, learn the difference between the discomfort that is part of pushing yourself to achieve your working zone in a pose from sharp pain that indicates the need to modify your movements. This is key to getting the best workout and reaping all of the benefits of barre!


About the Author

Steph Hinnershitz completed her barre training in 2020 through Cleveland’s Barre Fly studio. She is also a published historian and an education consultant and lives with her husband in Montgomery, Alabama.

cbc test price in bangladesh tsh test price in bangladesh lipid profile test price crp test price vitamin d test price dengue ns1 test price hba1c test price ecg test price echocardiography price x ray chest pa view price whole abdomen ultrasound price mri brain price in bangladesh ct scan whole body price popular diagnostic center price list pg hospital test price list ibn sina diagnostic center price list labaid diagnostic price list evercare hospital chattogram price list parkview hospital chittagong price list chevron clinical laboratory chittagong price list